Sunday, June 30, 2013
Simple Crock Pot Italian Wedding Soup with Kale
I just came back from a month long trip to Pittsburgh, Pennsylvania where I was born and raised. We have an amazing soup there called Italian Wedding Soup, which, I just found out, is not actually Italian.
At any Italian restaurant (or often any restaurant) in Pittsburgh, you can order a bowl of Italian Wedding Soup. My favorite kind is the light version served at the chain restaurant Olive Garden. Since I was not very cultured and didn't travel much before moving out of Pittsburgh, when I went to the Olive Garden in California I tried ordering Wedding Soup. It's not usually on the menu in Pittsburgh because it's such a popular item and everyone knows it's there--you just have to ask for it. But the California waiter had no idea what I was talking about.
I always thought Italian Wedding Soup was an Italian tradition. Though, apparently, Italian Wedding Soup is a Western Pennsylvania tradition started by immigrants to the area. According to my quick research, Italian Wedding Soup is a mistranslation of a soup called "marriage soup," which is actually Spanish.
Here is a quick version to make in the crock pot using kale instead of the traditional spinach. Italian Wedding Soup is usually made with really tiny meatballs and pasta. Unless you make the meatballs yourself, you might not be able to find them small enough, but you can always cut slightly thawed frozen Italian meatballs into quarters before putting in the crock pot.
Ingredients:
1 small package frozen italian meatballs (15-20)
5 oz can low sodium chicken, rinsed and drained
32 oz chicken broth
2 cups kale, stems removed and chopped (can also use spinach)
1 1/2 teaspoon garlic powder
1 bay leaf
1/2 teaspoon Italian seasoning
1/4 teaspoon black pepper
1/2 yellow onion, chopped
1/4 cup-1/2 cup pastina pasta
parmesan reggiano for serving
Directions:
1. Add meatballs, chicken, broth, spices, and onion to slow cooker and stir to combine. Cook on high for 3 hours.
2. Add pasta and kale (or spinach) to the pot, and cook for an additional hour on high. Serve
topped with parmesan reggiano if desired.
Coconut Coffee Ice Cream
The past few summers living here have been very mild, but for some reason it's July in Mountain View and 90 degrees. Tuesday it's supposed to go up to 100 degrees! After spending over three weeks in air conditioning this apartment is awful. The heat is bearable but draining. So I was super tired after my flight and decided to make an easy, no cook, coconut ice cream to beat the heat. My chocolate chips were actually melted in my cupboard from the heat, so I made coffee ice cream out of instant coffee instead. It makes a nice pick me up as well, which I needed! Make sure your coconut milk is full fat and chilled for a day or two in the fridge. It also helps to chill the bowls and containers you will be using, especially if it's a hot day. Oh my, this coconut ice cream is so delicious--it tastes like a Starbucks Vanilla Frappaccino with whipped cream.
Ingredients:
2 cans full fat coconut milk, chilled
2 tablespoons instant coffee
3/4 cups white sugar
1 teaspoon vanilla
Directions:
2. Open cans of full fat coconut milk. Solid part should be at the top if fully chilled. Leaving the cream in the can, drain only the light liquid coconut milk into the bowl of coffee and sugar. Whisk until sugar is dissolved.
3. Prepare your ice cream maker. I just need to get my frozen bowl out of the freezer and set it in the mixer. Stir the coconut cream remaining in the can into the coffee/milk mixture until well blended. Immediately pour into ice cream maker. Let mix for 25-30 minutes. Freeze to harden or enjoy soft.
Saturday, June 1, 2013
Eggless, Dairy Free "Egg" Salad
I've been eating tofu a lot lately, and it's not because I need to. I love eggs and meat, am not going vegan, and have no food allergies. But I love the taste of tofu, and I love how light and easy it is to digest. It's cholesterol free, virtually carb free, low in calories, and still packs protein. My stomach feels untroubled after eating tofu--feels more relaxed and slim.
I was a little wary of tofu at first. It seemed foreign and tasteless. Then I realized it's what you do with tofu that makes it delicious--just like the dairy free products I use. I started putting it in scrambled eggs and omelets, then added it to flavorful dishes like curry and soup. I really got crazy and made a recipe using tofu to make dairy free chocolate mouse. It's pretty delicious. I love that Chipotle now has a tofu option for their burritos. I usually get chicken, but after trying the sofritas, I was completely sold. I noticed a huge difference in how my stomach and body felt after eating a burrito bowl with sofritas versus chicken. Tofu is just so much easier for the body to digest.
This tofu recipe is quick to mix up and full of flavor. Experiment with different spices to see what suits your tastes. Eric is adverse to this particular recipe because it has sweet relish in it--he hates vinegary things. But I love pickles. For a totally different flavor, I want to try it with curry next. The best thing about this tofu salad? No egg boiling, peeling, or slicing!
Ingredients:
1 12oz package silken tofu
1/4 cup vegan mayonaise
1/4 teaspoon turmeric
1/4 teaspoon black pepper
1/4 teaspoon smoked paprika
1/8 teaspoon dry mustard
1/8 teaspoon sea salt
2 celery stalks, finely chopped
1/4 cup chopped yellow onion
2 tablespoons sweet relish
1 teaspoon chopped fresh parsley
green olives for garnish *optional
Directions:
1. Remove tofu from packaging, draining water, and place on paper towels. Pat dry. Mash or crumble the tofu into medium bowl.
2. In a small bowl, mix vegan mayonnaise, turmeric, pepper, paprika, mustard, salt, and then add to tofu.
3. Mix in celery, onion, relish, and parsley. Cover and refrigerate for 30 minutes. Serve on crackers as an appetizer, in a bowl as a veggie dip, or make an egg salad sandwich. It's so delicious!
Friday, May 31, 2013
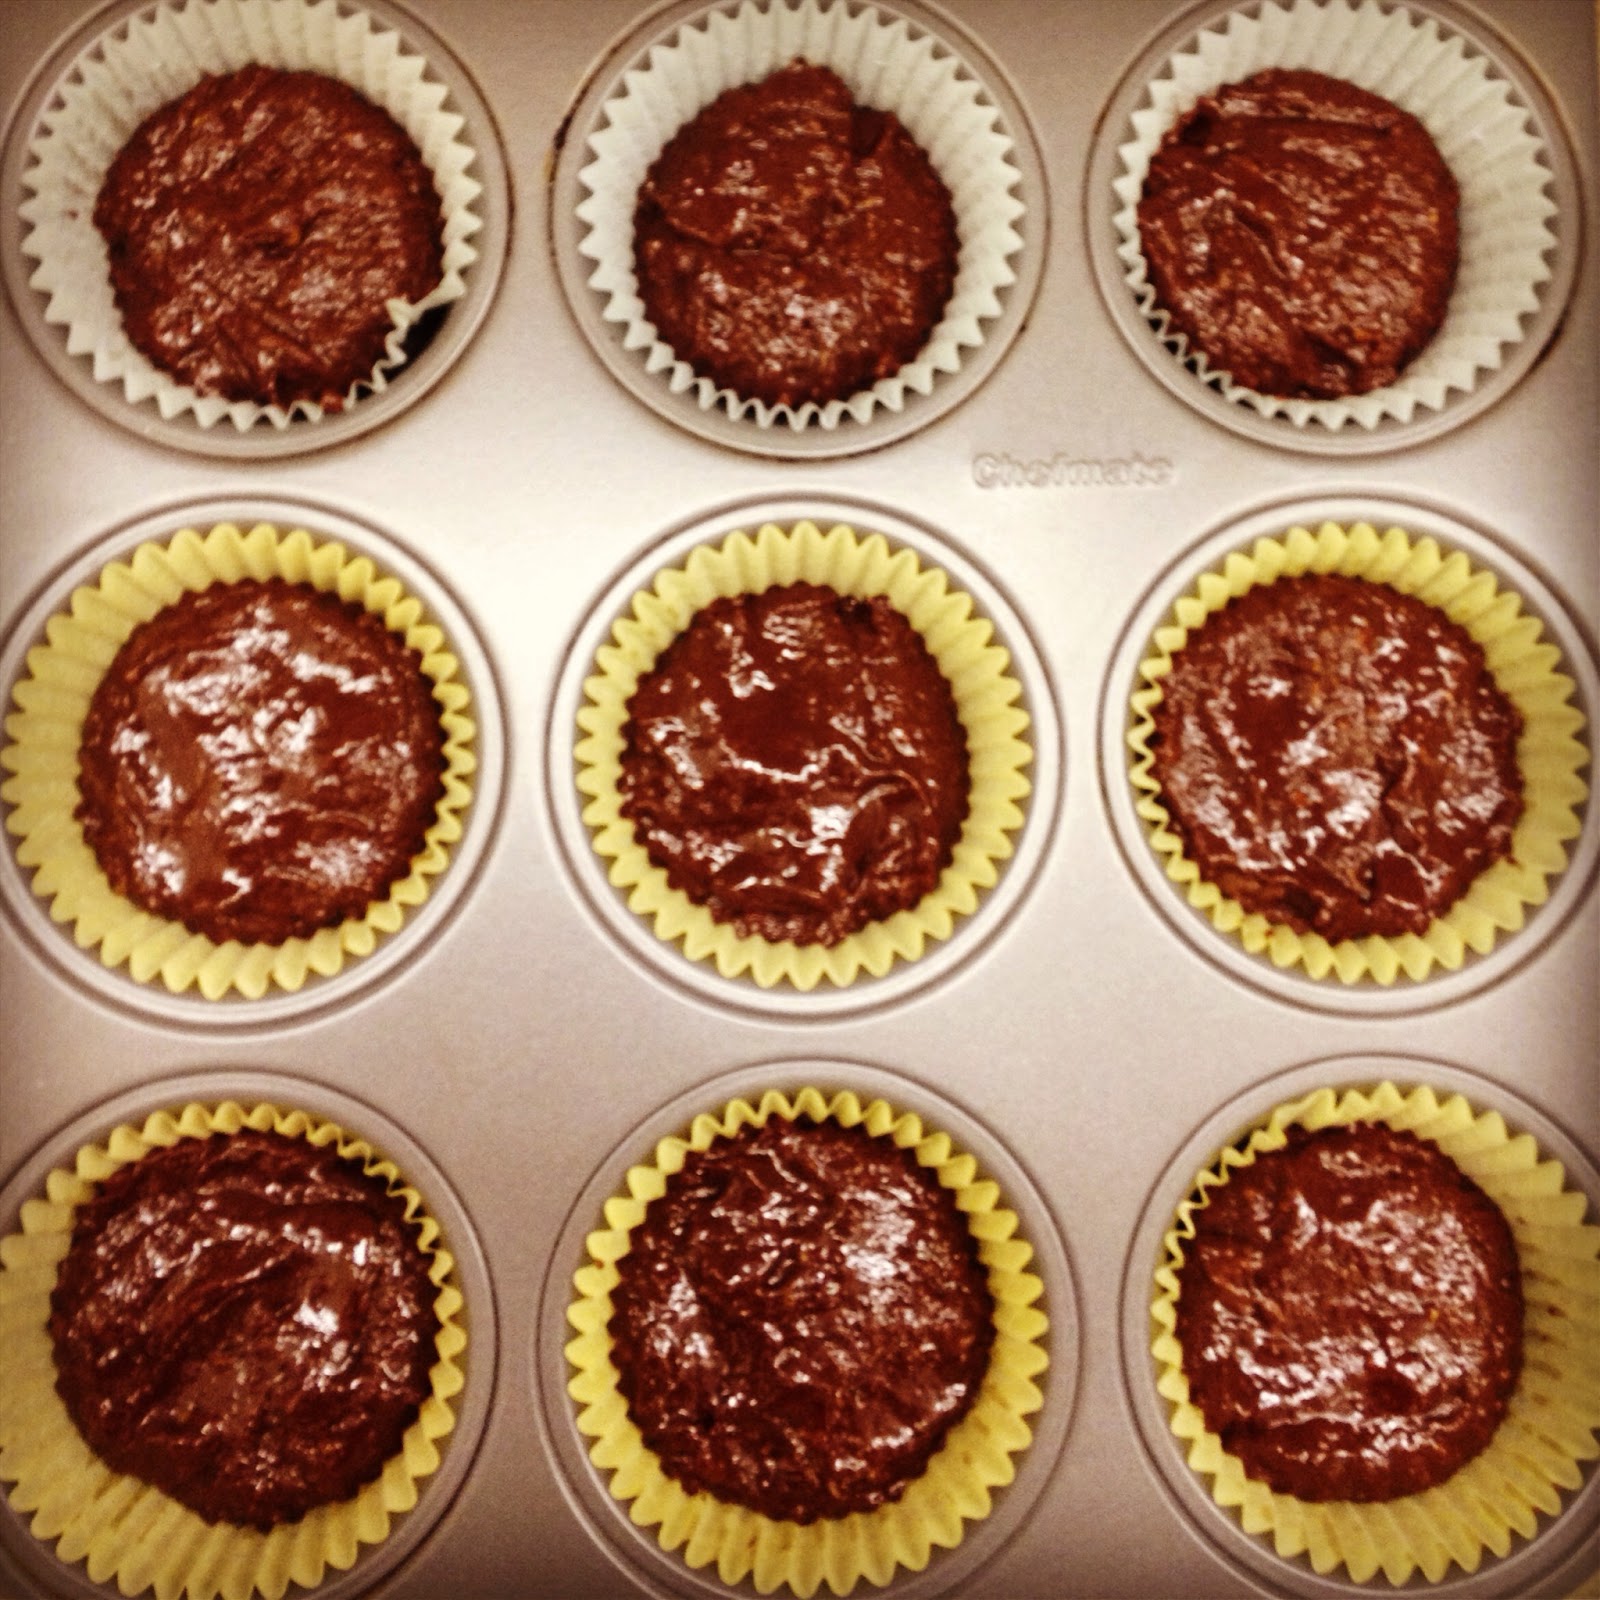
Nutella Brownies
I first saw the idea for Nutella brownies on Pinterest, although, when I went to click on the link to the post it was marked as spam. I looked up another recipe for proper cooking time. It was a bit more complicated, so, filtering out the extras, I was able to decipher the very simple way of baking Nutella brownies.
I made these for my best friend Alicia for her bridal shower, since one of her favorite foods is Nutella! She spent some time in Italy studying abroad and she would bring Nutella to our dormitory, where we would eat it out of the jar with pretzels and spread it on croissants.
I wrapped the brownies in blue wrappers to match her wedding colors. They were a big hit: chewy, soft, melt in your mouth chocolately hazelnut goodness.
The brownies will look too soft and not quite done--don't panic! This is how they are supposed to be. Don't cook them too long!
P.S. These are not dairy free. Nutella is made with skim milk. However, I ate one at a time with no lactose intolerance problems. These are extremely rich, so I recommend eating one at a time anyway! My ultimate goal is to create dairy free chocolate hazelnut brownies. Will start working on that asap.
I wrapped the brownies in blue wrappers to match her wedding colors. They were a big hit: chewy, soft, melt in your mouth chocolately hazelnut goodness.
The brownies will look too soft and not quite done--don't panic! This is how they are supposed to be. Don't cook them too long!
P.S. These are not dairy free. Nutella is made with skim milk. However, I ate one at a time with no lactose intolerance problems. These are extremely rich, so I recommend eating one at a time anyway! My ultimate goal is to create dairy free chocolate hazelnut brownies. Will start working on that asap.
Ingredients:
1 cup Nutella
1/2 cup plus 2 tablespoons flour
2 eggs
Directions:
Charred Citrus Broccoli
For anyone who has a child, or a husband, who won't eat plain vegetables, this is a flavorful way to serve broccoli as a side dish. I made it most recently to go with a pulled pork tenderloin recipe. For awhile I was cooking broccoli by lightly steaming in the microwave or steam cooker then adding a little SmartBalance and Mrs. Dash all-purpose salt free seasoning. I could only get Eric to eat about two pieces--which he claimed was a full serving of vegetables--then I usually ate the rest. I love broccoli in any form!
At some point Eric started coming home from work raving about the vegetables they served at Google. Well, I'm no trained chef, but I wanted to give some dishes a shot. I asked Eric for the best descriptions he could possibly give. This was hard to work with, but I did my best. I know that Google chefs post typed ingredients above each dish served in the food places. If I asked a woman to figure out the ingredients for me, she would probably take a picture on her Android, or even ask the server in person, jotting it down and shooting me a quick text. However...
I made due with the description of crisp, crunchy, charred, and tangy. I immediately recognized why Eric loved this brocolli--he loves crispy, toasted, burnt things. When he asks for toast he means it better have some black on it. I looked up some recipes and experimented. What I came up with was apparently correct and "better than Google," which makes me feel accomplished. This is the simple broccoli that he will get another serving of, or eat right out of the pan. I have broiled this recipe as well as baked it and the result is great either way.
Ingredients:
1 head fresh broccoli
1/2 1 lime
1/2 1 lemon
1 teaspoon olive oil
sea salt
black pepper
Directions:
1. Preheat your oven to 400 degrees Fahrenheit. Rinse and drain broccoli, shaking dry. Cut off the stem and discard, then break up the head into bite size pieces and place in a medium size bowl.
2. Coat broccoli pieces in the juice of half a lemon and half a lime, olive oil, then sprinkle with a dash or two of sea salt and black pepper. Stir to coat. The broccoli pieces will turn a brighter shade of green when evenly coated in citrus juice and oil, and liquid will be absorbed.
3. Line a baking sheet with foil and place broccoli pieces, spreading them apart (not on top of each other) so that they can charr evenly. Cook for 10 minutes, checking often. They are done when they are slightly blackened. Should be crisp, crunchy, charred, and tangy.
At some point Eric started coming home from work raving about the vegetables they served at Google. Well, I'm no trained chef, but I wanted to give some dishes a shot. I asked Eric for the best descriptions he could possibly give. This was hard to work with, but I did my best. I know that Google chefs post typed ingredients above each dish served in the food places. If I asked a woman to figure out the ingredients for me, she would probably take a picture on her Android, or even ask the server in person, jotting it down and shooting me a quick text. However...
I made due with the description of crisp, crunchy, charred, and tangy. I immediately recognized why Eric loved this brocolli--he loves crispy, toasted, burnt things. When he asks for toast he means it better have some black on it. I looked up some recipes and experimented. What I came up with was apparently correct and "better than Google," which makes me feel accomplished. This is the simple broccoli that he will get another serving of, or eat right out of the pan. I have broiled this recipe as well as baked it and the result is great either way.
Ingredients:
1 head fresh broccoli
1/2 1 lime
1/2 1 lemon
1 teaspoon olive oil
sea salt
black pepper
Directions:
1. Preheat your oven to 400 degrees Fahrenheit. Rinse and drain broccoli, shaking dry. Cut off the stem and discard, then break up the head into bite size pieces and place in a medium size bowl.
2. Coat broccoli pieces in the juice of half a lemon and half a lime, olive oil, then sprinkle with a dash or two of sea salt and black pepper. Stir to coat. The broccoli pieces will turn a brighter shade of green when evenly coated in citrus juice and oil, and liquid will be absorbed.
3. Line a baking sheet with foil and place broccoli pieces, spreading them apart (not on top of each other) so that they can charr evenly. Cook for 10 minutes, checking often. They are done when they are slightly blackened. Should be crisp, crunchy, charred, and tangy.
Thursday, May 23, 2013
The Benefits of Sea Salt
I've always been a big advocate of using sea salt when cooking meals, rather than your average table salt. Recently I read some articles online that tried to tell readers sea salt was no better than table salt. If you happened to read those articles as well--please don't believe them. The only positive thing I can say I got out of them was that they got me to think more about sea salt vs table salt, which is important. It's not smart to just chase after the new fad ingredient or food without doing some research and thinking about it first. Why is it better? Why should I use it? Will it really benefit me in anyway? What's the best way to incorporate it into my life so I will benefit from it?
I generally try to use fresh ingredients or products with no added sodium. I add other spices into recipes so I can skip salt altogether. Spicy things like red pepper flakes and cayenne pepper can add so much flavor I don't find a need for salt. The same thing goes for potent flavors like garlic, onion, and basil. But sometimes I add a dash of sea salt to bring out those flavors, and it comforts me to know sea salt is better to use than regular table salt.
Yes, by weight, sea salt and table salt contain the same amount of sodium. Sea salt does not have less sodium than table salt. This was the point of those articles. Moderation of salt intake is one of the most important considerations in maintaining a healthy diet. However, because sea salt is not refined and usually coarse, you end up using less salt in measurements. Sea salt has a saltier, more potent flavor as well, so for less salt you get more flavor, therefore not missing the extra salt. One grind of the sea salt shaker provides more flavor than a few shakes of the table salt shaker-so true!
One of the greatest things that makes sea salt better than table salt is it's mineral content. Here's a paragraph from my favorite low-sodium diet cookbook "Muscle Chow," by Gregg Avedon:
"Sea salt is obtained by the simple process of concentrating sea water under the sun. Up to 5 percent of sea salt is composed of naturally occurring potassium, calcium, and magnesium, the minerals that are responsible for the salt's mild flavor and good taste. Because sea salt is naturally occurring, your body can readily assimilate its minerals--they're just like the nutrients from food. Table salt, the salt most people use, is mined from inland salt deposits, heated to extremely high temperatures, and refined with chemicals. Potassium iodide or sodium iodide is added to create iodized salt. Dextrose (sugar), sodium bicarbonate, and sodium silicoaluminate, are often added to keep the salt white and easy to pour."
Still wondering what's the best salt to buy at the super market? Get the coarse sea salt! And here is a tip I often provide in my recipes: it is always healthier to add your own amount salt. If you don't want the no salt added canned vegetables, tomato sauce, and cooking stock because of taste, you should buy them anyway and add your own salt. You can decrease the sodium content of your meals by buying no salt added canned foods and add sea salt instead, judging the flavor by your own taste. By doing this and switching to sea salt you can drastically decrease the amount of sodium in your diet, which can help maintain water retention in your body and decrease your risk of high blood pressure and heart disease.
Tuesday, April 30, 2013
Guacamole Pasta
I was inspired by a recipe from the blog Oh She Glows, which I found on Pinterest. Maybe you saw it? It was called Creamy Avocado Pasta. I tried it out and loved it, then decided to take it a step further with some of my favorite pasta ingredients. I had a fresh bag of avocados and had recently made a delicious batch of guacamole. Most of my usual pasta toppings are also in guacamole, so they'd go perfectly well with avocado pasta, right? That was my hypothesis. I collected materials and then experimented in my lab (kitchen). My conclusion? A work of art both in taste and appearance. I was satisfied. It's an excellent comfort food if you love avocado. Next time I might add a bit of Toffuti Sour Cream to make it creamier, as the dish loses some of it's creamy texture when adding all those other ingredients. I bet it would go well with gluten free corn and quinoa pasta--like chips and guac!
Dice the grape tomatoes after cooking at your preference. I like my grape tomatoes whole and bursting with juiciness in every bite, but this recipe would be great with the tomatoes a little more blended. It doesn't store for very long since it's avocado, but the acidity of the tomatoes should help preserve it a little. Store in a super airtight container if you must store it, but this dish is best eaten right away.
Ingredients:
1/2 lb. uncooked pasta
1 package grape tomatoes or two cans diced tomatoes (drained)
1/2 yellow onion, finely chopped
3 cloves garlic, minced
2 tablespoons olive oil
1 teaspoon sea salt
1/2 teaspoon black pepper
1 avocado
dash lime juice
fresh cilantro, coarsely chopped (for topping)
Directions:
1. Preheat oven to 400 degrees Fahrenheit. Add onions, whole grape tomatoes, olive oil, garlic, sea salt, and black pepper in a medium size casserole dish (I used a glass loaf dish). Mix well, then place in oven cook for 30 minutes.
2. Timing this perfectly so your pasta is ready when your sauce is ready, cook your pasta according to package directions. While your pasta is cooking away, cut your avocado in half, remove the pit, and scoop out the creamy green fruit into a large mixing bowl, mashing it a bit. Add a dash or two of lime juice.
3. When your pasta is cooked, drain it and then toss immediately into the soft avocado. Also add the oven roasted tomato sauce. Make sure you add all that hot, garlicky olive oil! Mix thoroughly until the pasta is evenly coated. Serve and top with cilantro, sea salt, and black pepper. Superb said the herb.
Subscribe to:
Posts (Atom)