Monday, July 16, 2012

Summer Plums


The family I work for gave me a huge bag of red plums from their backyard tree last week, so over the weekend I found some delicious plum recipes on the internet.

I discovered plum bread. I never knew there was such a thing as this and I was skeptical about how it would turn out, but I'm glad I tried it. Forget pumpkin and zucchini bread, this sweet bread is my new favorite.

It's easy to make it dairy free by using Smart Balance Light and soy yogurt. You can also substitute applesauce for the yogurt. If you use greek yogurt (I did), there is much less lactose in it so it shouldn't be bothersome unless you are highly sensitive. I'm sensitive to lactose but I can eat about a cup of greek yogurt with a lactaid pill and be okay.

You can also cut the sugar by using half sugar and half SPLENDA, or use all SPLENDA. I recommend using a sweetener even if your plums are very sweet, but this would still be a good bread with less sugar.

I also made a balsamic plum reduction sauce to go with a pork tenderloin. Since my husband hates anything with vinegar, I reduced the two tablespoons of vinegar the recipe called for with a teaspoon of vinegar. It smelled just right and tasted amazing to me, so I didn't want to add any more than that.

Eric and I took some pictures of our dinner with our new camera. I'll get better and more creative with it as I keep practicing!

Plum Bread

Ingredients:


1 1/2 cups pitted, chopped plums--keep the skins on!
1 tablespoon all purpose flour
1/2 cup Smart Balance Buttery Spread Light, softened
1 cup sugar--I used 1/2 SPLENDA, 1/2 white sugar
1/2 teaspoon vanilla extract
2 eggs--you can use 4 eggs whites, or a combination, for less fat
1 1/2 cups all purpose flour
1/2 teaspoon salt
1/4 teaspoon baking soda
1/3 cup of plain or vanilla soy yogurt--actually, any fruity flavor will do!
Sprinkle of brown sugar (optional)

Directions:

1. Preheat oven to 350 degrees Fahrenheit. Grease a loaf pan with olive oil spray or Smart Balance.

2. After chopping your plums, sprinkle them with 1 tablespoon of flour and toss to coat then set aside.

3. In a large bowl, beat the sugar, butter, vanilla, and eggs with a wire whisk until smooth. Add the yogurt and mix until well combined.

4. In a separate bowl, mix together the flour, salt, and baking soda. Slowly stir the dry mixture into the egg and sugar mixture.

5. Once smooth, fold in the chopped plums and pour batter into the loaf pan. Sprinkle with brown sugar.

6. Bake for 45-50 minutes, or until a knife inserted in the middle comes out clean. Let cool in the pan for 10 minutes before removing. Let cool for another 30 minutes before slicing, but enjoy that first warm slice before it cools completely. Bet the taste will surprise you!
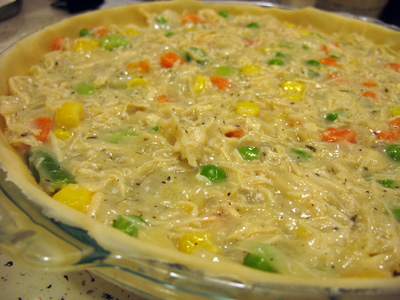
What it looks like right before the oven.


Pork Tenderloin with a Balsamic Plum Reduction

Ingredients:

1 pork tenderloin
sea salt and black peper
1 tablespoon olive oil
2-3 small plums, pitted and chopped
1 teaspoon balsamic vinegar
1 tablespoon brown sugar
1 tablespoon honey
2 tablespoons blueberry juice--I think a berry jam would work here. I used the blueberry fruit and syrup from the fruit on the bottom yogurt.

Directions:

1. Preheat oven to 400 degrees and line a baking sheet with foil.

2. Rinse the pork tenderloin then pat dry and season each side with sea salt and black pepper. Heat olive oil in a non-stick skillet until hot, then sear the tenderloin for three minutes on each side before transferring the pork to the lined baking sheet. 

3. Roast the tenderloin for 15-20 minutes depending on the size. Once cooked, let stand for five minutes before slicing.

4. While the pork is cooking, begin the reduction sauce. Add the plums, vinegar, brown sugar, honey, and juice or syrup into a small saucepan and cook over medium low heat, until ingredients are well blended and plums are soft, about 5-10 minutes.

5. Transfer the sauce to a blender or food processor and blend until smooth. Return the sauce to the saucepan and simmer until reduced and thickened, another 5-10 minutes depending on how much liquid you have added. Spoon the plum sauce over the sliced pork medallions and enjoy with Herby Quinoa. Share with your hungry Chihuahua!


Mia's favorite spot--right by the stove.

Balsamic Plum Reduction


Friday, July 13, 2012

Herby Quinoa

Did you know that quinoa is a seed? It comes from a type of plant called a goosefoot, or Chenopodium, a species of annual herbaceous flowering plants. It looks like this as a plant:


I made the following quinoa recipe to go with our Turkey Meatballs last night. It's not my recipe, but I tweaked it a bit to fit my likes and needs. I feel that quinoa by itself is too bland, but I love it mixed with other flavors. This a flavorful side dish to compliment meatballs or steak.

Ingredients:
1 tablespoon, plus 1 teaspoon Smart Balance Buttery Spread Light
1 cup uncooked quinoa
1 14.5 oz. can (or 2 cups) vegetable broth
1 small yellow onion, chopped
2 tablespoons fresh parsley, chopped
2 teaspoons minced garlic
1/2 teaspoon dried thyme (or 1 tablespoon fresh)
1/4 teaspoon lime juice (optional)

Directions:
1. Melt 1 tablespoon of Smart Balance Buttery Spread in a saucepan over medium heat. Add quinoa and toast, stirring often, for about five minutes. This is what uncooked quinoa looks like:


2. Stir in vegetable broth and bring to a boil. Start to caramelize onions (see step 3). Reduce to simmer, cover, and cook for 15 minutes or until quinoa has sprouted and liquid is absorbed. It should look like this when it is done:
3. While your quinoa is cooking, in a separate pan, melt 1 teaspoon of Smart Balance Buttery Spread over medium low heat. Add onions and cook for about 5 -10 minutes.

4. In your saucepan of cooked quinoa, toss in caramelized onions, garlic, parsley, thyme, and lime juice and mix thoroughly. It's so delicious!


Monday, April 16, 2012

Dairy Free Orange Cranberry Quick Bread


We just moved into a new apartment, and it had a couple of issues. The tiny bathroom floor was pretty gross, and over a couple of days it began to reveal an ant problem. So today I was stuck inside waiting for the specialists to come in and take care of things.

The exterminator came first and sprayed the areas where the ants were coming from, followed soon after by three hispanic men that I could barely understand but believed to be the guys that would replace the bathroom flooring.

The one had the nerve to tell me that the old flooring was still good...I guess if you are okay with yellow staining, gashes, and ant colonies it was still good.  Didn't they want to get paid? They were then followed by the maintenance man who came to see that they did the job right.


Since I was stuck inside all day to wait for everybody, I decided to whip up something healthy for Eric  for when he got home. And, of course, I wanted to enjoy it as well, so I adapted a quick bread recipe to be dairy free. I happened to have orange juice and cranberries on hand, so I made a super healthy whole grain orange-cranberry bread with Very Vanilla Soymilk.

It's pretty easy to put together but requires some whole grain ingredients like whole wheat flour and fiber rich wheat bran.  Not everyone is likely to have these ingredients in their cupboards but they are good to keep around. It's cooking right now and smells delicious.

Ingredients:
1/2 cup unbleached white flour
1 cup whole wheat flour
1 cup wheat bran
3/4 cup brown sugar
1 teaspoon baking powder
1/2 teaspoon baking soda
1/2 teaspoon salt
1 cup dried cranberries
1 egg
1/2 cup Silk Very Vanilla Soymilk
1 cup orange juice
1/3 cup vegetable oil

Directions:


 1. Preheat oven to 350 degrees Fahrenheit.


2. In a large bowl, whisk together the egg, Very Vanilla Soymilk, orange juice, and oil.


3. In a medium bowl, combine flours, wheat bran, brown sugar, baking powder, baking soda, and salt.


4. Add dry mixture into wet until just combined, then stir in cranberries.


5. Pour into a greased loaf pan and bake for 50-55 minutes. Cool in the pan for 15-20 minutes before removing.


6. Serve warm for your sweetheart ;-)

Thursday, March 8, 2012

Fresh Tomato Basil Pasta

Bucatini Pasta with grape tomatoes and dried basil.
I didn't come up with this simple pasta dish--I heard it on TV one morning and the recipe was so basic I remembered it exactly the next time I bought grape tomatoes. Whenever I eat it I swear there is nothing more perfect in life. I have yet to find a restaurant that makes such a delicious tomato basil pasta dish.

I have my own way of making this easy dish and love to share it! The freshness and quality of the simple ingredients really make this dish special. I try to buy fresh pasta from a local farmer's market. While I'm there, I also buy some good looking grape tomatoes, fresh garlic, and basil. You will want a good olive oil as well. It is easy to add other ingredients to this sauce to make it your own. I would suggest trying onions, red pepper flakes, cooked bacon, or a shredded hard, aged cheese. Try adding all if you like! This is a very versatile dish that can be great for lunch or dinner, served as a side or a main course!

Ingredients:
1/2 lb. fresh made pasta from your local farmer's market. I also recommend Bucatini/Perciatelli Pasta if you do not have fresh pasta.
1 small package of beautiful shiny red grape tomatoes
3 cloves garlic, sliced
4 leaves Fresh basil, shredded-- a 1/2 teaspoon of dried basil also works well
Olive oil
Sea Salt
Black Pepper

Directions:
1. Preheat your oven to 350 degrees Fahrenheit. After rinsing your grape tomatoes, set them in a small glass pan in a single layer. Then add your sliced garlic.

2. Drizzle with enough olive oil to coat the tomatoes and garlic well, adding a little extra as sauce that will coat your pasta. Add the sea salt and black pepper. I'm usually good about low-sodium cooking, but you want to add a generous amount of sea salt to this dish. It really brings out the overall flavor of the sauce. Stir to coat evenly. Then sprinkle the basil on top.

3. Cook for 40 minutes. If you want to make this dish faster, you can certainly cook it for 20-25 minutes at 425 degrees Fahrenheit, but I don't think it's perfect this way ;-). 

4. While your tomatoes and garlic are roasting, boil water for your pasta during the last 20-15 minutes, depending on if you are using fresh or boxed pasta. To serve, spoon the tomato basil and olive oil sauce over your hot pasta. Pair with a sweet Moscato and be in heaven.

Monday, February 27, 2012

Dairy Free Chicken Pot Pie


Chicken pot pie is the perfect comfort food for a cold winter night, unless you're lactose intolerant. Then it can be quite uncomfortable. Most recipes call for milk, cream, or creamy condensed soup. Here's a simple pot pie recipe that I crafted to be dairy free! It's also very good for you. A chicken pot pie made with ingredients that are not low in sodium can contain over 1,000mg of sodium in a single serving. All that salt is unnecessary! Replace it with flavor. There are a few extra steps than the canned soup method, but it's still fairly simple and totally worth it. Remember to rinse your shredded chicken breast after draining the liquid from the can to reduce the sodium content.

Ingredients
1 box refrigerated pie crusts, softened (FYI: Pillsbury crusts contain hydrogenated oils which = trans fat)
3 tablespoons Smart Balance Light Buttery Spread
1/2 yellow onion, chopped
1/2 teaspoon pepper
1/2 teaspoon sea salt
1/3 cup all-purpose flour
2 cups low sodium chicken broth
1/2 teaspoon dried thyme leaves
1/8 teaspoon ground sage
1 12.5 oz can Valley Fresh low sodium chicken breast, drained and rinsed
1 4.5 oz canValley Fresh low sodium chicken breast, drained and rinsed
2 cups frozen mixed vegetables, rinsed (corn, peas, carrots, green beans, lima beans)

Directions


1. Heat oven to 425 degrees Fahrenheit. Place one pie crust inside a 9 inch glass pie pan--don't trim excess just yet!


2. In a large saucepan, melt Smart Balance over medium low heat. Add chopped yellow onion, sea salt, and pepper, and cook until tender, about 2 minutes.


3. Stir in flour until blended, and quickly follow with chicken broth, gradually adding the broth while stirring constantly. Add thyme and sage. Cook for about two minutes or until mixture starts to bubble and get thick.


4. Stir in shredded chicken and mixed vegetables until well combined. Let cook for two more minutes, stirring frequently.

5. Remove from heat and spoon complete mixture into prepared pie crust. Top with the second pie crust and seal the two crust together with a fork. Fold the extra over and under the edge of the pie pan. This will prevent the crusts from separating while baking. Trim the excess dough underneath the edge.


6. Cut five slits in the center of the pie to let steam escape. Bake fifteen minutes to brown crust, then reduce heat to 350 and cook for twenty-five to thirty minutes. If crust starts to burn, you can carefully cover the edges with foil. Let pie stand for at least 10-20 minutes before serving. The longer it sits the easier it is to serve, but if you are really hungry you should just dig in.


Sunday, January 29, 2012

Three Potato Barbecue Chips


Try these out for a perfect game day snack! This is the tastiest BBQ seasoning I've ever had, and the different types of potatoes make it uniquely yours. Make sure to slice them very thin, and use the leftover seasoning on your barbecue chicken dinner!

Ingredients:

10-15 small purple, red, and gold potatoes, very thinly sliced*
1/2 cup canola oil

Seasoning:

2 tablespoons white sugar
2 teaspoons chili powder
1 teaspoon brown sugar
1 teaspoon paprika
1/4 teaspoon fine ground sea salt
1/8 teaspoon garlic powder
1 pinch of red pepper

*Makes 2 1/2 to 3 cups of potato chips.

Directions:

1. Fill a large bowl with ice water about halfway full. Rinse potatoes under warm water, and then slice them very thin. Place slices in a small colander and let soak in ice water as you are slicing.

2. Heat the canola oil in a large saucepan over medium heat until hot. You should use just enough oil to cover the potatoes--anymore is just too much.

3. Take about 20 slices of potatoes out of the ice water and pat dry on paper towels, then add them to the hot oil. Cook for about three minutes on each side or until browned and crispy. Remove chips from oil with a slotted utensil and place on plate of paper towels to absorb excess oil.

4. While chips are still drying, sprinkle seasoning on one side, then flip layer of chips over and sprinkle on the other side. After a few minutes they are ready to go into a serving bowl.

5. Start your second batch and continue frying until finished. Seal in an airtight container or Ziploc bag to keep fresh--if you have any leftovers!


Monday, January 16, 2012

Game Day Guacamole

Check out this Perfect Guacamole Recipe from Simply Recipes. Tested and approved by me :-) It's a great accompaniment to Lime tortilla chips and Superbowl playoff games. Guacamole is a perfect alternative to the cheesy or sour cream based dips I love. It's much healthier as well. I only used one serrano chile pepper--that was quite enough spice for me! Enjoy!